Requirements
- SSL certificate
- Credit card processing terminal
- WooCommerce 2.0 or better needs to be installed
Installation
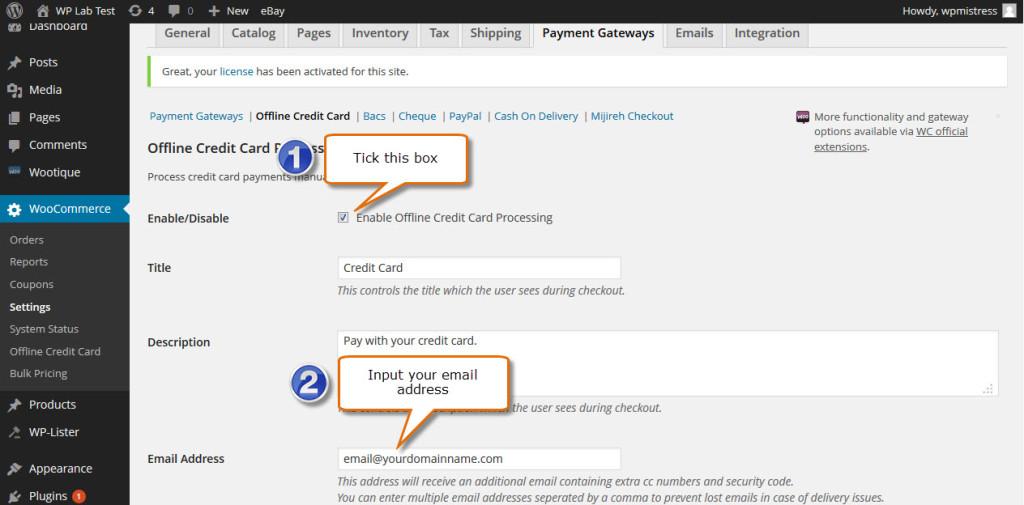
After you uploaded and activated the “Offline Credit Card Processing for WooCommerce” plugin visit WooCommerce -> Settings -> Checkout. Then click on the “Offline Credit Card” tab.
1. Tick the checkbox “Enable Offline Credit Card Processing”.
2. Enter the email address to send the additional emails to.
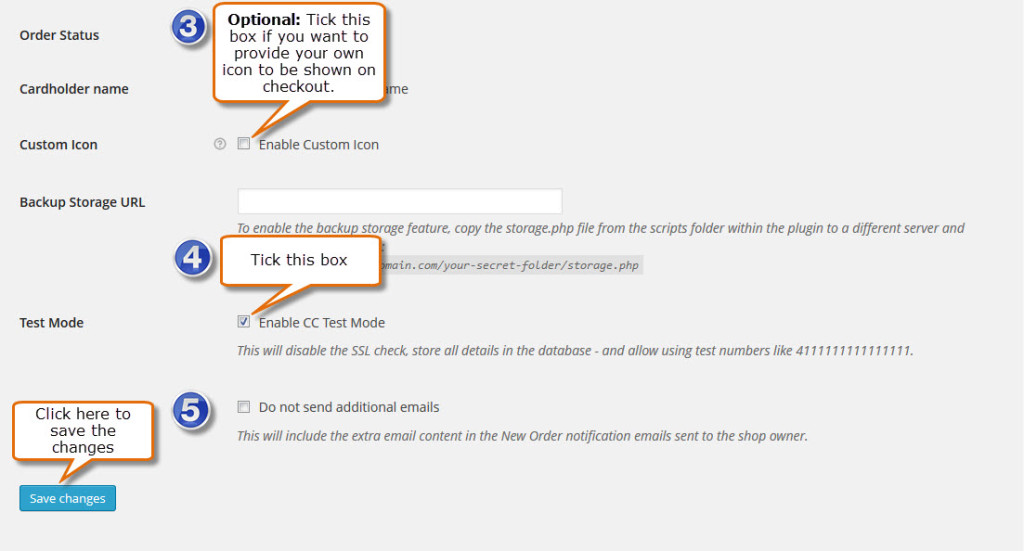
3. Optionally tick the box “Enable Custom Icon” if you want to provide your own icon to be shown on checkout. Otherwise skip to step 4.
4. Tick the box to “Enable CC Test Mode” if you don’t have a SSL certificate installed yet.
5. Click “Save changes” when you’re done.
Check installation
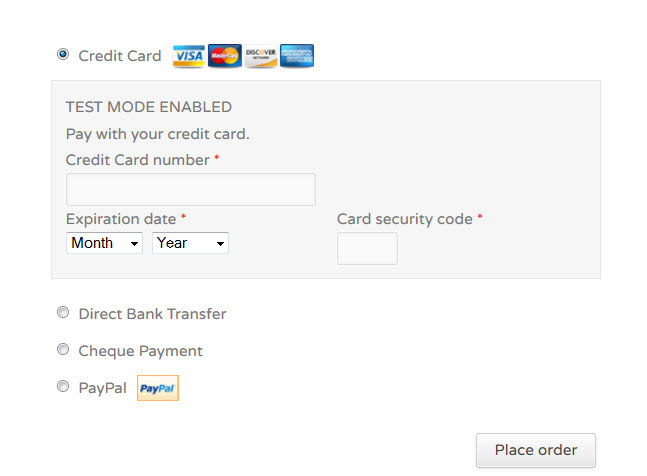
Visit your checkout page to confirm the new payment gateway has been installed and activated successfully.
Testing
Before going live with your production site you must make sure that everything is set all right and that all emails show up where they are supposed to. Remember, if these emails don’t reach your inbox, the data is lost and there’s no way you can recover it.
To be able to properly test this even on a staging site or a site without SSL certificate, you can enable “Test Mode” and do a couple of test purchases. While the plugin is in test mode, you’ll be able to use dedicated test card numbers like 4111111111111111 as well.
You should test with one email address first. When the first email address received the additional email, you can proceed by adding another email address – this way you have different emails which minimize the risk of losing data. Make sure to test again after adding another email recipient.
If you failed to receive the additional emails, try another email address with different provider – for example Gmail. There has never been any issue reported when using a Gmail account, so please try a Gmail account before you report issues of missing emails to support.


